

I have a dilemma. See, I love new things--especially new clothes. But the super skinny debt-reduction diet does not afford the luxury of a lot of shopping. What it does afford is a healthy dose of Use it Up, Wear it Out, Make Do, or Do Without.
So when I did the winter for summer wardrobe exchange the other day and felt the shopaholic itch I decided to take matters into my own hands. I am not so keen on the Do Without part, but the Make Do I can handle.
If you don't like something you see {in your closet}, change it. I took a few manly looking work shirts and gave them a feminine facelift and got them ready to wear for summer. Tutorial after the jump. Sun's out, guns out!


For our first project, I give you the {J.Crew} Perfect Shirt Make Do.
What you’ll need:
A long sleeve or 3/4 sleeve button up work shirt
A little bit of fusible interfacing
Matching thread
Sewing machine and other various supplies like snips, rotary cutter and a cutting mat, though a good pair of fabric scissors and a straight edge will be fine
Iron/ironing board
*Note: I had my stitch length set pretty small for most of this project, like a 1.5 or 2.
First we’re going to “fix” the collar.

2. Unstitch the top stitching (if it’s there) and the seam connecting the two parts (top and underneath) of the collar so you have two matching pieces.
 3. All of the collars I've reshaped already have interfacing ironed onto one of the pieces. If yours doesn’t, I highly recommend cutting a piece of fusible interfacing in the shape of the collar and ironing it to the wrong side of one of the collar pieces.
4. Find a pattern. I used the Peter Pan collar from another shirt as a pattern and turned those points into a smooth curve. Or you can download a pattern from the world wide web. There sure are a lot out there. I wasn’t in love with any of them, hence…


6. Now you’re ready to reattach it to the shirt. Mark the center of the collar and the center of the collar stand with a pin or tailor’s chalk and line them up.
7. Tuck the raw edge of the collar back inbetween the front and back of the collar stand and pin from the center out.
 8. Sew along the original stitch line from one side to the other and lock it in with a back stitch on both ends. This is such an important trick and I try to make sure I do it every time the end of my seam is going to show. I’ve been sewing for at least 25 years and I didn’t learn about until I was working on a project with a friend in college and I saw her do it. I was like, “what was that?” and she was like, “uh, don’t you backstitch your seams? Everybody does it!” Anyway, I learned my lesson.
9. Snip your threads and press your new Peter Pan collar.
Now let’s work on those sleeves. One thing about my sewing habits, I rarely use a store bought pattern. I figure why spend the money on a pattern if the whole point is to save cash and I can take a perfectly fine, well fitted garment from my closet and either recreate it or, if it’s not perfectly fine, update it. Right? Okay then. The sleeves on these bad boys needed to be shorter. I have three, maybe four sleeve options coming your way. Here’s the first and the most straight forward.

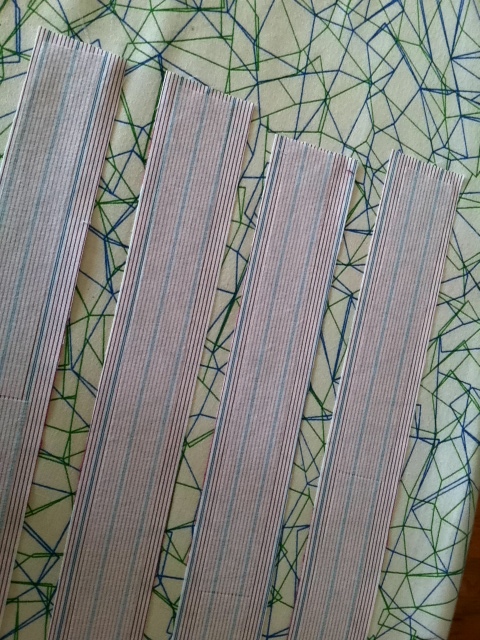
1. Lay your shirt flat and place your straight edge at your desired length on one of the sleeves, add at least 5/8” for your seam allowance and mark it with tailor’s chalk if you’re using scissors or cut with your rotary cutter.


*With a striped pattern, I like the stripes to go horizontally as shown on the cuffs. If it’s solid, you can cut your strips by just cutting a loop off of your existing sleeve, do step 4 and then skip to step 6.
5. Sew the two ends, right sides together, to make a loop. Press the seam allowances flat.
 6. Slide the loop around the sleeve, right sides together, and line up the edge with the bottom raw edge of your sleeve. Also line up the seam on the cuff with the underarm seam of the sleeve. Since I pieced two rectangles together to make it long enough, I have a small seem outside of the sleeve as well as the underarm side.
8. Fold up the raw edge up about 1/4 inch (wrong sides together) and then fold it up again so that your first fold comes up just past the seam connecting the cuff to the sleeve and pin all the way around both sleeves. *Tip: make sure you pin on the outside or right side of the cuff, it may be trickier to pin, but it will be a lot easier to take the pins out as you sew.

9. Now do your best attempt at “stitch in the ditch” by sewing the cuff, right side up, with the needle going up and down in the little ditch created by the seam. The idea is for the thread to grab the unsecured edge of the cuff on the underside of the sleeve AND leave a relatively invisible stitch on the outside. Pretty clever.
10. Press and voila. You’ve got a summery, more feminine top ready to wear.
2 comments:
May I just say -- you have an AWESOME sense of fashion. Seriously, you look so put together every time I see you.
very clever
Post a Comment